Price £80 – £100
Weight – 1.2kg (ex pegs & guys)
Score – 8 out 10
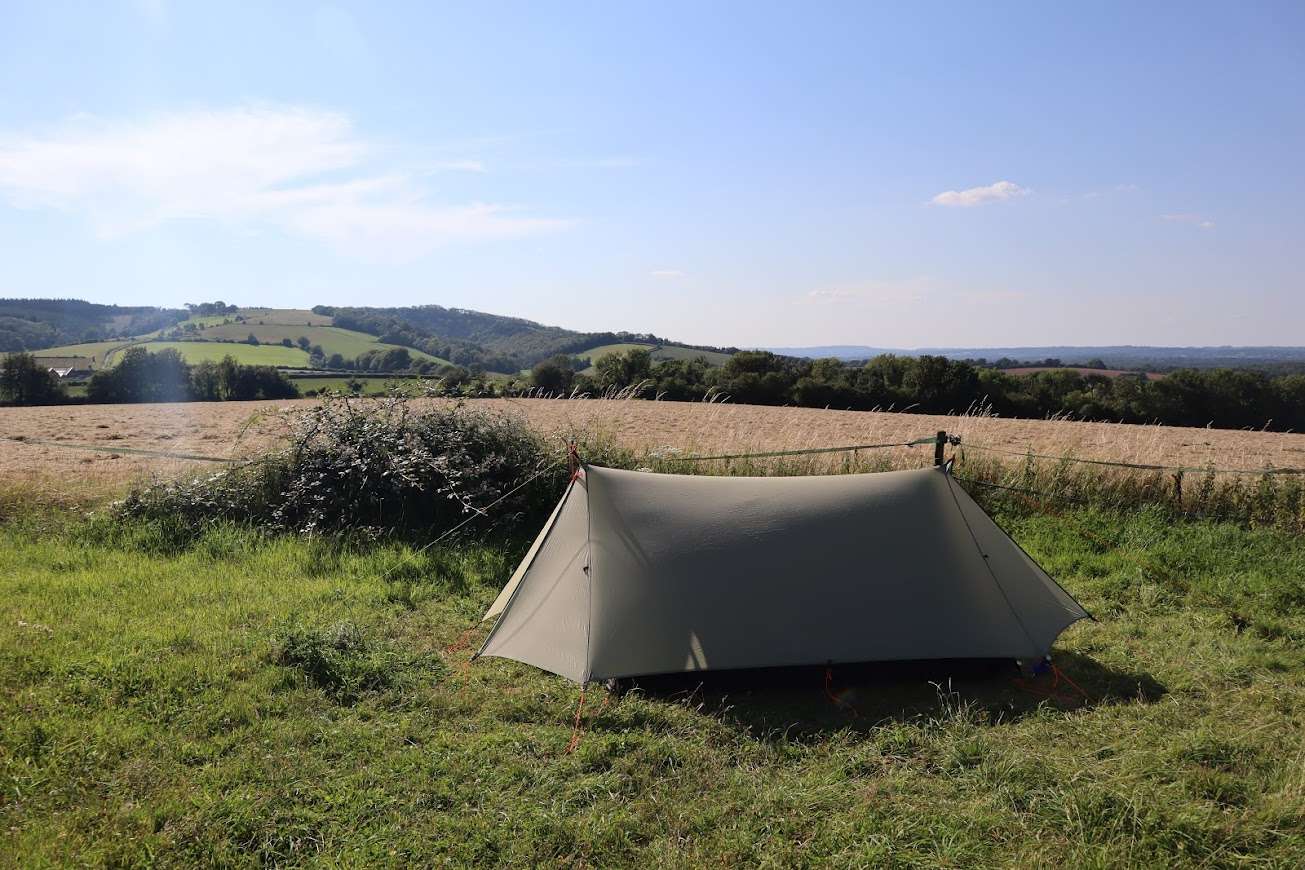
I needed a 2 lightweight person tent for my recent thru-hike of the South Downs Way and while I fancied splashing out on a Zpacks Duplex their waiting time was 2 months plus, so I decided to look at alternatives. After researching the popular alternatives and adding them to the gear comparison website I’m working on, I decided to take a gamble on an affordable trekking-pole style tent from the Chinese manufacturer Aricxi.
I don’t normally do these types of reviews but seen as nobody has bothered to review this tent so I thought I would let other people know about my experiences!
Pros
- Very lightweight for the price (1.2kg excluding pegs & guy ropes)
- You can use the tent as an outer only(500g) or inner only(700g) setup.
- 20D Sil-nylon is strong enough to take a beating
- Multiple pitch-up options make the tent very versatile
Cons
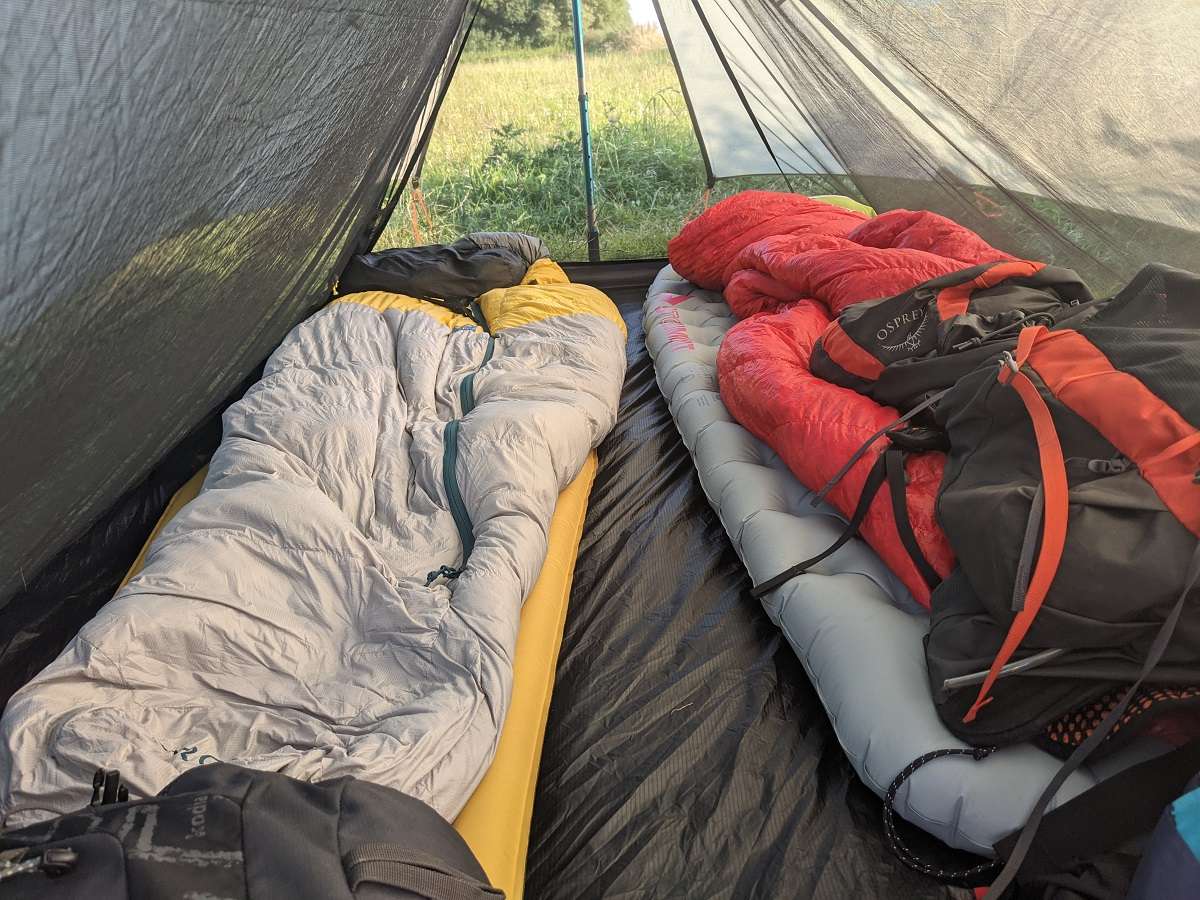
- The gear storage space is very limited, more suited to 1 person for a longer trip
- The tent requires the use of trekking poles, which is extra weight to if you don’t normally use them.
- It takes a bit of practice to set the tent up effectively
- It’s not freestanding, so you have to pitch on good ground.
- You’ll probably want to replace the heavy pegs the tent comes with.
Pitching the tent
If you’ve never pitched a trekking pole style tent before then you will want to practice setting up the tent before you use it properly. The best technique is:
- Peg out 2 guy lines from the front center of the tent, leaving about 2 foot of slack.
- Put a trekking pole in the front centre and stand the pole up as much as you can.
- Repeat for the rear of the tent.
- Peg out the out guy points from corners of the tent.
- Remove or move the front and rear guys as needed.
The first time I did this I faffed around for 30 minutes but eventually I go the whole process down to under 10 minutes
Setup Options
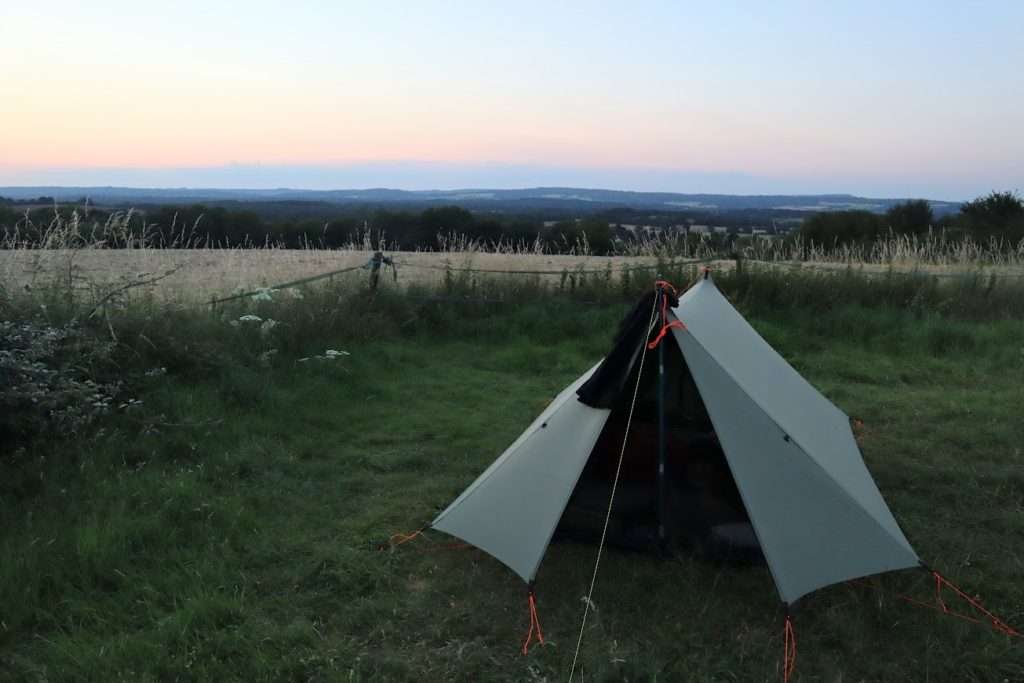
Triangle tent – closed.
This is the most wind & rain proof configuration for the tent. It also offers the smallest footprint for small pitches. You can unzip the to or bottom of the door to allow ventilation.
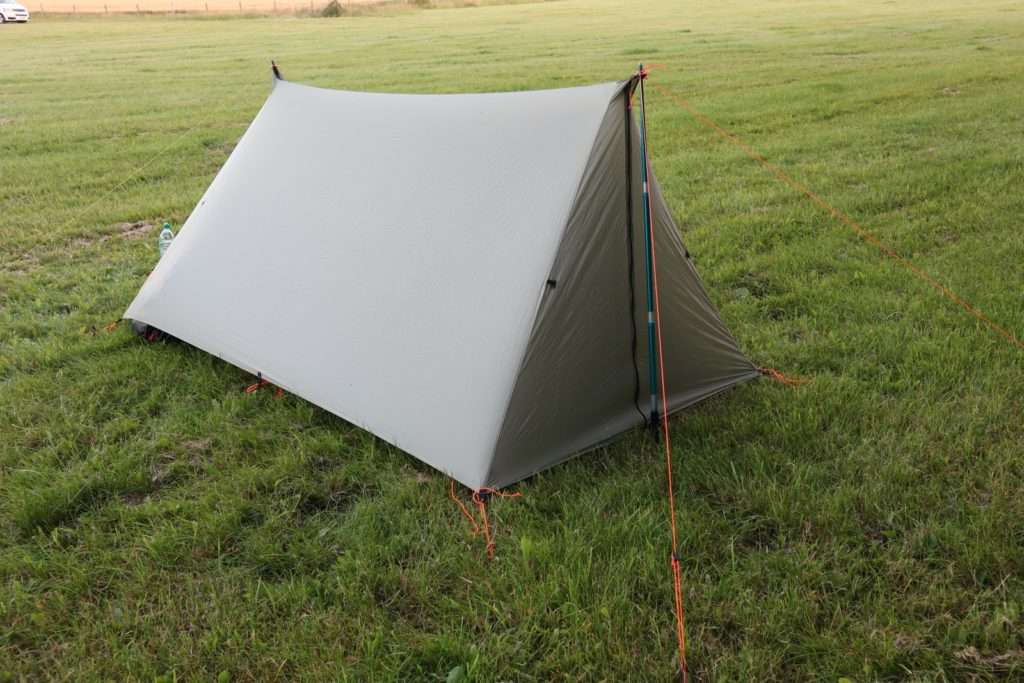
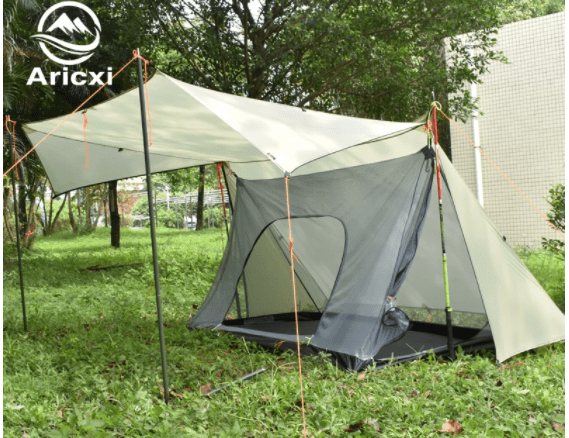
Open-ended triangle tent
This configuration allows for more ventilation, more room to store gear out of the train and a little more space inside. There’s a bit less privacy though. You can use this style with either or both ends of the tent.
Tarp style outer only
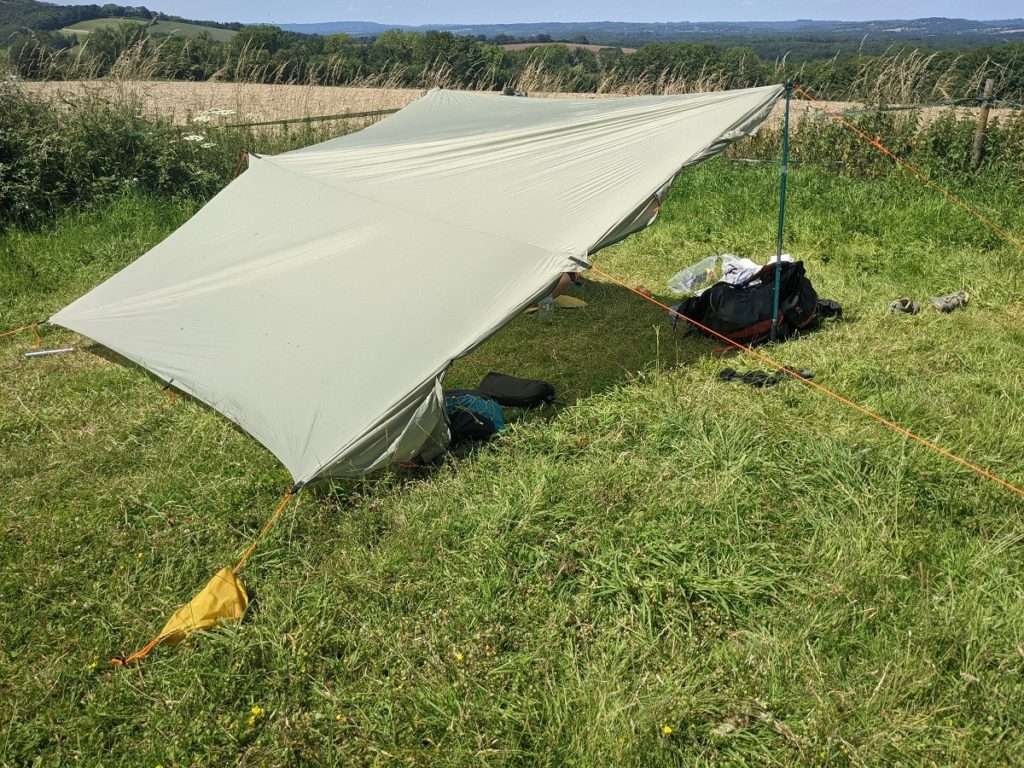
You can use this configuration for sun protection! Also good if you wan a more open setup.
Side Open Bush-craft style
This configuration takes advantage of the inner tent middle door. Great for chilling out in light rain of sitting out of the shade. You’ll need 4 poles for this setup.
Marquee Style
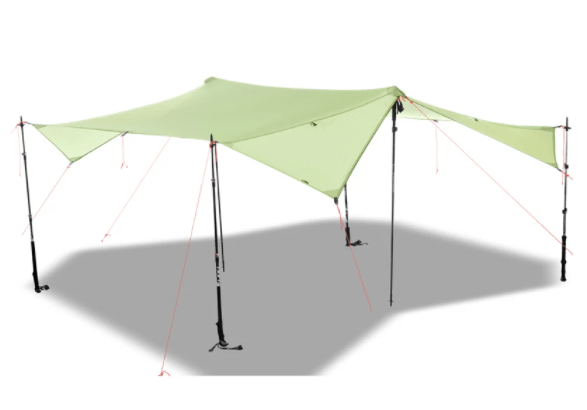
If you have a large group and can get hold of 6 poles (or tie up one side to a fence or tree branches) then you can set the tent up marquee style.
Rain & wind proofing
I left the tent out in the rain and wind overnight and there was no leakage – though I would want to test the tent overnight in a storm for full confidence.
Conclusions
This tent has a number of strong positives and few tents can close in terms of price and weight, though the trekking-pole setup is going to be a bit of an issue for those used to free-standing or semi-freestanding tents.
It is at the higher end weight-wise for a 1 person tent for a long-distance through hike, and a little small for 2 people for more than a few days at a time.
The outer only setup is super-light at only 500 grams so this will be my go-to tent where I don’t need mossie protection or a groundsheet.